What is an email optin content lock?
When it comes to email marketing optin rates, I’ve found nothing more successful than a content lock (sometimes called gated content). I do this with Bloom currently; here’s an example of the results I’ve seen.
(this is a refreshed/updated version of this case study from 2016)
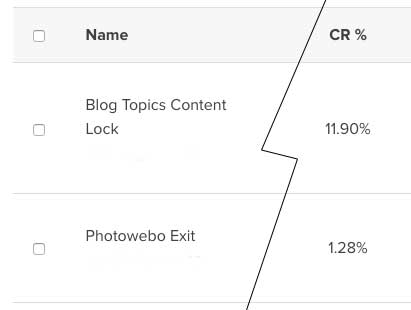
I first used this feature several years ago, implementing it as an experiment to see what happened. What struck me the most was as I looked at my email optin dashboard was the stark difference between my general site conversation rate (via an exit intent popup) when compared with the new Blog Article optin rate:

That’s an 829% increase in optin percentage. I went from having roughly one in 100 visitors register as a free VIP subscriber to having just over one in ten make the move.
Content Lock is the Key
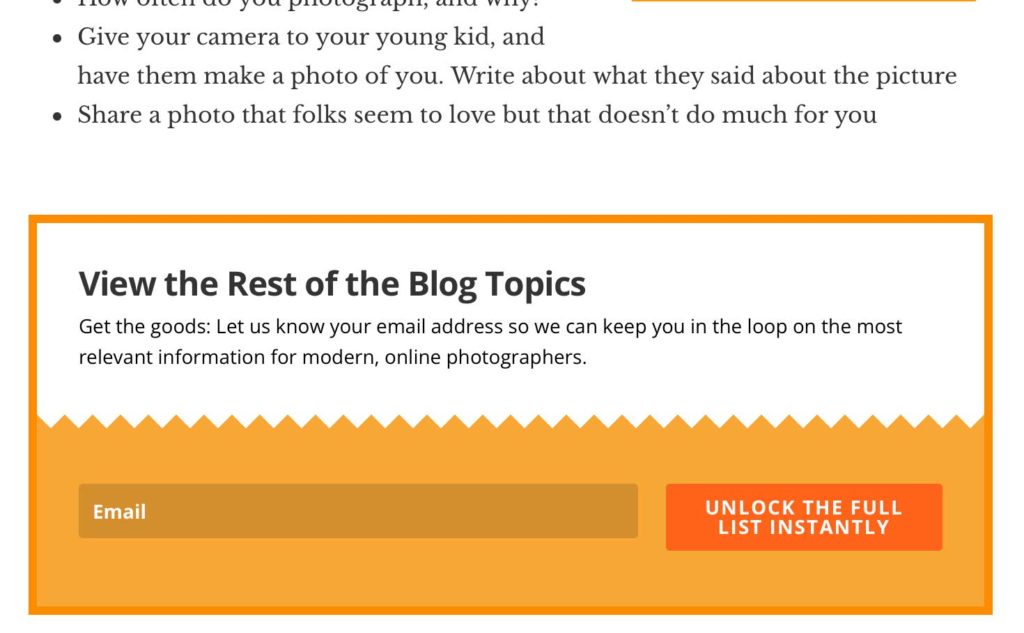
Bloom is the best option1 for compelling email optin forms and other features for your website, and the Locked Content optin is the key. It’s not a full-fledged membership system, instead it’s something much more lightweight. I added the feature to my popular Blog Topics for Photographers article. When a new visitor hits the article, they get to see the beginning, but to see the entire thing, they can leave their email address. They instantly see the rest of the article, and they’re now subscribed for ongoing free updates from me. Here’s what it looks like as they get to the end of the unlocked portion:

How To Make Bloom Locked Content Work for You
If you want to take advantage of this great way to build your email list, you’ll need two things: first, you’ll want to be using Bloom. Then, you’ll need to identify an attractive article (either one you’ve already written, or one you plan to write) for the piece that’s going to bring folks in. This can’t be just another blog post. It needs to be some sort of resource providing real value for your audience. You’re asking for something of value… their email address… and you need to provide something of value in return (sorry, photographers, “here’s my latest client shoot” isn’t going to cut it for this).
Once you have that solid content in place, it’s time to set up the Bloom Locked Content feature. It’s pretty straightforward.
The usual pattern if you’re adding a traditional optin form to your website is that you create the form, and then insert some code that either directly embeds the form on your website, or allows it to show based on some sort of event such as a timer or the visitor’s exit intent. It’s pretty much just as simple to add a content lock form to the middle of your article. Much how you’d copy and paste a bit of code to appear wherever you want an optin form on your website, with the content lock form you edit your article that you want to use for the optin, and insert the line of code at the point where you want the form to appear. In my case, I added it about 40% of the way through the blog topics article I referenced above. It’s up to you how much of your article is visible to everyone versus how much you choose to obscure behind your optin form.
Once you’ve decided where you want to “gate” the content, add the one line of code that you’ve copied and pasted from the Bloom interface, and you’re set. Anything that is after that line of code will be obscured by default, and only visible once someone has subscribed to your email list. The technical work is done.
With your content-locked article ready to go, you’re all set to promote the heck out of that article. Optimize it for search engines, try to drive social media traffic, and so on… assuming you’ve built something helpful, and have given them a good teaser of what’s to come if they opt in, you should start seeing significant email signup results.
-
I’m not just saying this. I’m a paying customer, and have become an affiliate such that the links in this article are referral links where I’ll receive a small commission. ↩

Leave a Reply